Install via Network
Installing Windows via Windows Deployment Services (WDS)
This is the recommended method for installing Windows on machines that support booting via the network (i.e., “PXE” or “PCI LAN”, and so on). You must be registered for wired support on the EECS network.
Booting via the network varies by machine and BIOS. On a Lenovo Thinkpad T61p, for instance, you press F12 at the start of the boot process to get the boot menu; then choose the PCI LAN boot device; then press F12 again as soon as you are prompted to Press F12 for network service boot.
After choosing an available WDS image, Windows will load some files for installation. Click Next at the “Welcome to Deployment”, and then you will be prompted for credentials; enter your EECS Windows user name (e.g. joeshmo) and password, and the domain name eecs. At the prompt to “Select a task sequence”, you’ll need to again select the desired WDS image.
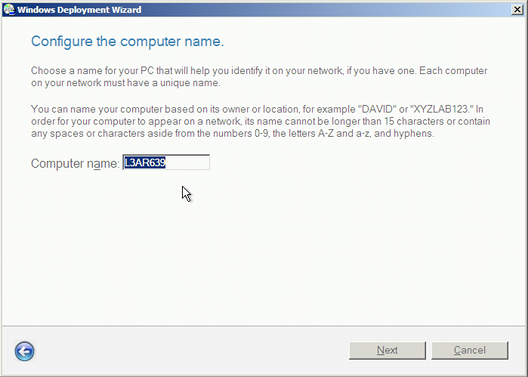
When prompted to configure the computer name, enter the system name that you successfully registered on the system registration form.

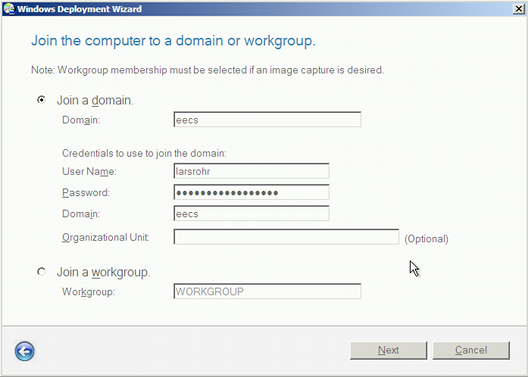
If your system was registered as a member of the EECS Windows domain, with you as its system administrator, you can select Join a domain, and fill in the domain name eecs along with your credentials.

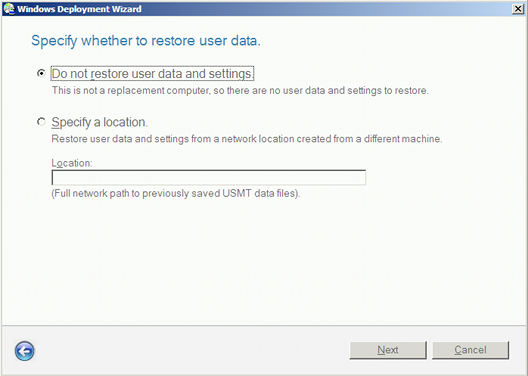
Next, if you have previously saved local user data with Microsoft’s User Settings Migration Tool, and have that data available on a network share, you may specify the location here. For a typical fresh install of Vista, leave Do not restore user data and settings selected.

You will be prompted to confirm your locale and timezone, and to set a local administrator password.
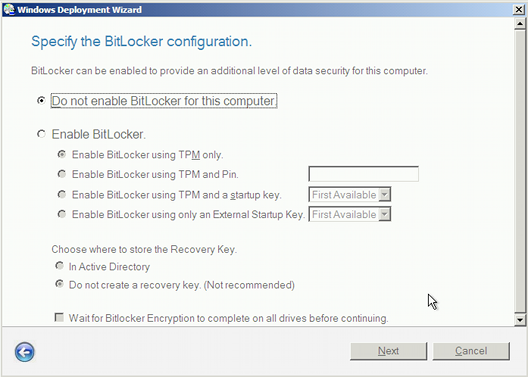
Bitlocker configuration comes next. Before enabling Bitlocker, make sure that you consider the ramifications of losing Keys or forgetting Pins (LastPass or similar provides a way to save secure notes), and that you know whether your system has a TPM chip. As of 2022, we also allow storing Bitlocker recovery keys in Active Directory, for machines joined to the EECS domain.

All the required information has now been provided, and installation will proceed.
Post-Installation Instructions
When updating is completed, connect your machine to the network and run Windows Update. You may need to install a network driver from your hardware vendor first, if your network card is not auto-detected.
- Click Start -> All Programs -> Windows Update
- If prompted with the “Internet Connection Wizard” click Cancel then in the next dialog window check Do not display this warning again. and click OK
- Use Windows Update to determine whether there are any remaining Critical or Important updates to install.
- Wait for the updates to install, and if you are prompted to reboot your computer, do so.
- Once the computer has rebooted, repeat these steps until there are no critical updates listed on Windows Update.
Now you are free to join the EECS domain, activate Windows, install software and other hardware drivers, and use your computer!